How to Automatically Purge Emails Under Specific Labels in Gmail [Hacks]
Find out how to make use of a Gmail script which can automatically purge emails under a label after a period of time.

I am sure, there are so many of us who gets annoyed by their messy inbox. As for myself; I prefer to read email that is actually sent to me by some real human being. But in this social network life, almost 70% of the email are about notifications, newsletters and updates.
Even though Gmail Tabs helps in some sort of way. The tabs still isn’t a complete solution. And social notifications and newsletters can flood your mailbox by taking up a lot of space.
How do we go about this? Simple – I am just going to sort/filter some emails under a specific label (e.g. “Newsletters”), and I am going to purge these emails under the label; automatically, at a period of time.
Get the Best Updates on SaaS, Tech, and AI
There are 3 steps of making this
- Identify and sort emails under a specific label
- Create a Gmail Script that would purge them after a period of time
- Setup trigger to run that script for the specific Gmail account
Step 1
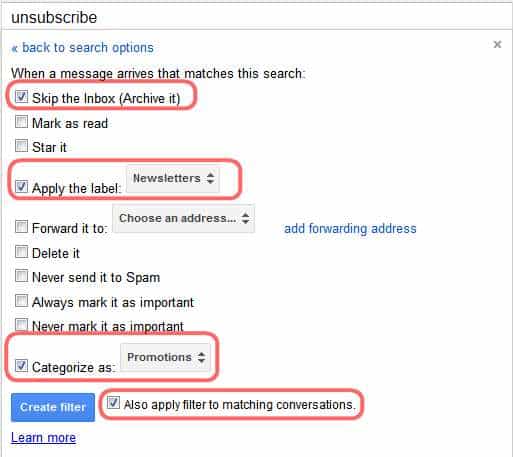
I am just going to sort out all the newsletter type of emails under a label called “Newsletters“. To do this, I need to create a filter in Gmail that would sort these emails in this label.
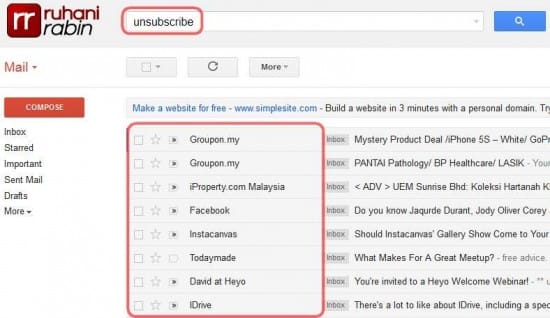
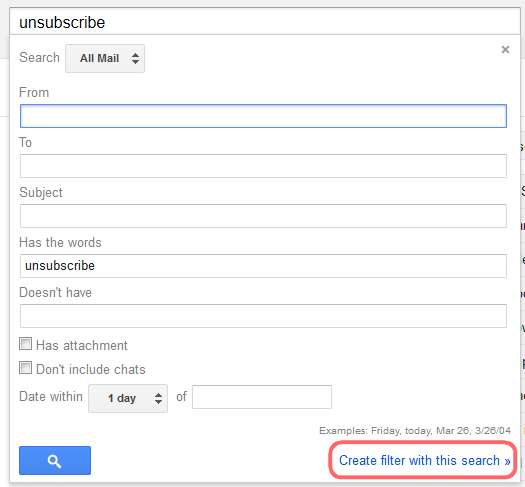
- Open your Gmail .. and at the Search box type “unsubscribe” (without the quotes). Then click Search. You will notice almost all the newsletters are listed using this keyword (Tips!).

- Now, use the “Show Search option” on the right of the search box. Yes, click that little grey arrow to see the search options. At the right side of that drop down box, there is a option to create a filter with that search.

- Select the options for the Filter – as you can see below.

- Once the Filter and Label is created, we can move on to the next step.
Step 2
Now, we are going to create the script that will be able to delete emails under specific label (or labels) on a schedule.
- Open drive.google.com while you are already logged in to Gmail
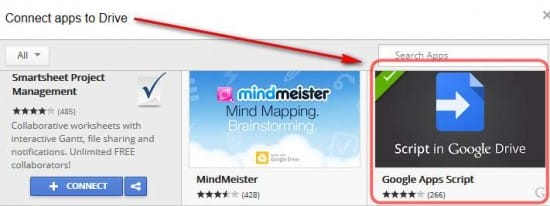
- Click on “Create” button in Drive. If you can’t see “Script” option under create, click on “Connect More Apps” option. Find and connect the app “Google Apps Script”. Once this is installed, we would be able to see the Create Script option in Google Drive.

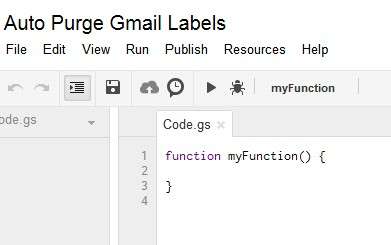
- Now, Click Create and create a blank script, which would look similar as you can see below. From File menu you can rename the project as you wish. For our example, we are using the name “Auto Purge Gmail Labels”.

Here is the code you need to replace the sample code in the code editor. (TIP: This piece of code is design to handle multiple labels at the same time. You might want to create another label to filter the notifications too)
[code lang=”js”]
function multipleLabels() {
var myLabels = {‘Newsletters’: "1d", ‘Label2’: "1d", ‘Label3’: "1d"};
var batchSize = 100; // Process up to 100 threads at once
for(aLabel in myLabels)
{
var threads = GmailApp.search(‘label:’+aLabel+’ older_than:’+myLabels[aLabel]+”);
for (j = 0; j < threads.length; j+=batchSize) {
GmailApp.moveThreadsToTrash(threads.slice(j, j+batchSize));
}
}
}
[/code]
You can make a copy of this script (From File > Make a copy) at my Google Drive Hosted Script.
Take a note on this part – var myLabels = {‘Newsletters’: “1d”, ‘Notifications’: “1d”};
The line above – Newsletters and Notifications are the label names. 1d represents the period of emails to keep. So, this script will delete the emails which is older than one day.
Click on the Play button on the toolbar to test out the project, Google will ask for Authorization at this step.
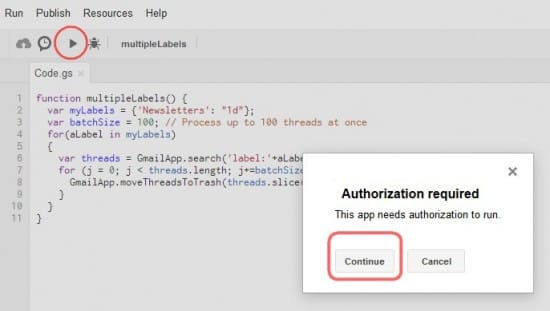
Click Continue button to set permissions. Click Accept button on the next permissions dialog.
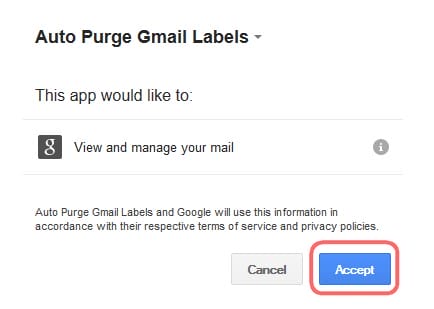
We’re done at step 2, moving on to step 3.
Step 3
We need to setup the trigger to execute this script. Click on Resources > Current project’s triggers option to set it up.
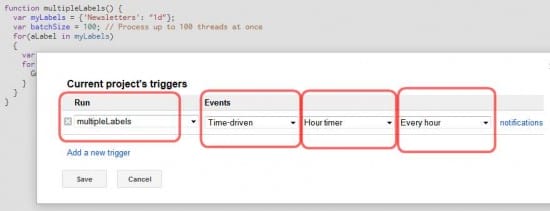
Once we have setup the trigger, it will automatically run on that interval.
Yes, that is about it. Set it up once and forget about it. Now you will have more cleaner mailbox at Gmail. You can create additional labels. Add them to this script to clean additional labels on interval too. Have fun!
FTC Disclosure: The pages you visit may have external affiliate links that may result in me getting a commission if you decide to buy the mentioned product. It gives a little encouragement to a smaller content creator like myself.


4 responses to “How to Automatically Purge Emails Under Specific Labels in Gmail [Hacks]”