How to setup Efficient Digital Photography Work-flow
“Digital photography work-flow” is a systematic way to capture, develop, sort, organize, export and archive your digital photo collection. I’ve explain these in this article


First of all, the inevitable question – “What is Digital Photography work-flow?”. In simplified explanation:
“Digital photography work-flow” is a systematic series of process to capture, develop, sort, organize, export and backup your digital photos.
I’m just a beginner photographer and I am learning photography in the hard way. My only teacher is Google and Flickr community. Walking along the path to the learning photography, I actually realized that professional photographers like J Knowles have a systematic work-flow for your digital photo processing. Slowly by many trial and error I’ve found a simplified way to capture, develop, sort, organize, export and archive my digital photo collection. Professional Photographers might have more efficient systems for their own digital photo processing which I would love to learn from them. Moving ahead, lets see how we could organize our overwhelming collection of digital photos.
- Capture the Photo

This is the very first step, obviously you need to start taking your photos before you process them. I try to shoot every day but due to my day job it is not always possible. Always try to take advantage of every minute you can shoot. Sometimes this can be walking down to a coffee shop downstairs or 10 minutes of walking to the bus stop. Photography is about capturing the moments. If you are a photography enthusiasts I would strongly recommend to take a specific timeout frequently for taking photos. Always seek for destinations you can take photos, you can search online or ask your friends. Specially on those dull and boring weekends you can plan for a trip to a nice photographic place, spend as much shooting you can do from various angles and from various arrangements.

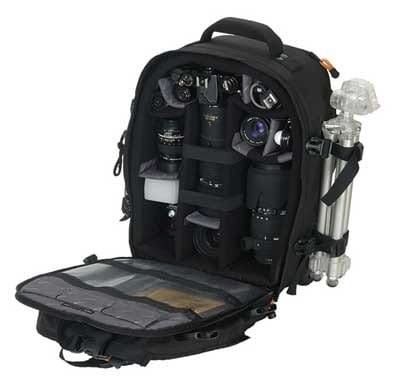
What you should bring along with you while you are on a photography trip? Well for starter your camera bag should include your camera body and your lenses, travel charger for both your camera and flash batteries, remote shooting tools (if possible), lens cleaner, extra memory card, portable USB hard drive/flash drive and a fast card reader. Also don’t forget your Tripod, which could be seriously useful during this long trips. If you have a laptop, don’t forget to bring it along. Keep your name cards handy in case you meet new people who you might want to exchange your photos. Well it looks kind of overwhelming but trust me I found myself in situations where I needed almost all of these things. TIP: Always try to shoot in RAW mode, which gives you maximum flexibility while developing the photo. - Transfer Images to Computer

I use a high speed USB card reader. All card readers are not the same. Spend the extra bit to get a high speed card reader. Off load your photos and keep your main memory card free for use. Usually when I plug in my card reader, Canon’s “Camera Window” software automatically loads. This software has options to pull all of my images off my memory card and puts them into folders on my computer titled by date taken.

After my images are transferred to my Computer I put the card back in the camera and delete the images off of it. So my card stays fresh to take the next batch of photos. TIP: If possible download your photos to your computer as frequently as you can. - Import and Sort

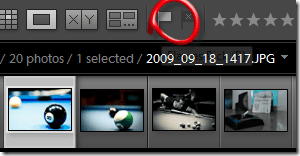
This step I use Adobe Lightroom software to Import my photos into the Lightroom catalog. After the import process, I go through all the photos with the photo flagging process which allows me to approve and reject the photos I like. These photos are the selections I’m going to process later. These selection might not be the very final one but at least these are the one worth processing. In general I will pick about 10%-30% of the photos from the total shoots. TIP: Always try to review your photos before start developing. - Develop

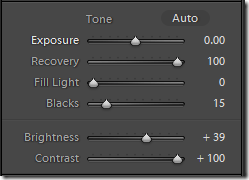
On the previous step I’ve already Imported and flagged out the photos I want to process. I will switch to Lightroom “Develop” mode and adjust those photos. These adjustments are non-destructive to the RAW format and you can always reset it back to original. Basically I do various adjustments on contrast, exposure, color temperature, brightness, fill lightening, blacks, clarity, vibrance and saturation.

An example of developing photos in Lightroom, you can see the differenceI’ll also use the vignette controls to create the optimal vignette to make the photo more classy. Lightroom provides more powerful tools which I’m not covering here right now. That is for you to explore. - Export

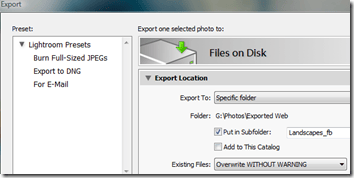
Once I’ve developed the images, I’ll export multiple JPG version of it into a “Exported” folder on my hard drive. Basically I use 2 different type for the JPG files for Exporting. First is the highest quality JPGs possible and second is the one optimized for web uploading such as Flickr and Facebook. The high quality JPG files can be edited by Photoshop for further enhancement and second export is web optimized JPG which are smaller and less DPI for easier uploading and “on screen” viewing. - Organize

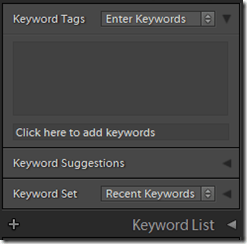
This step I’ll go back to Lightroom and switch to the “Library” mode and assign specific keywords or group of keywords to the photos. Keywords are very important for search and indexing. Usually I include the all the places and possible terms related with a photo. For example if I took a photo of the lake at Kelana Jaya at midnight, I would include the keywords like “Selangor” “Kelana Jaya” “Lake” “Landscape” “Water” “Long Exposure” “Night” with that photo. Also I will rename the imported folders to a more meaningful names. For example the imported folder name was “2009-10-17”; I will rename it to “2009-10-17 Kelana Jaya Lake”. There are more possibilities for renaming folders but this format of renaming is helping me out this far. - Backup your Photos

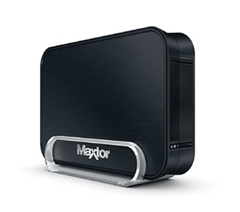
Once a days photos organization is done, I will transfer that day’s selected RAW files folder into my external backup drive. Currently I have two Maxtor 1 terabyte drives for backup. Afterward I will take my finished and exported JPG files and divide them into two categories “Class A” photos and “Class B” photos. Once the photos are sorted into these 2 categories I will backup them to the external drive too.

Photo Archive folder organization. - Publishing

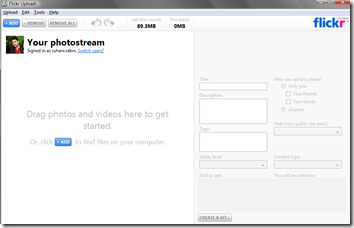
Publishing the files includes publishing to Flickr and Facebook albums. I specifically use 2 windows software for this purpose. First one is Flickr Uploader for Windows and the Second is the Adobe Photo Uploader for Facebook. Both of them are free and really simple to use.
Well, that is pretty much of my photography work-flow process. Yes, it might not be the most professional one but it is my current work-flow till I get to learn more about it. Please fill me in, share your thoughts and ideas about how you manage your “Digital Photography Work-flow” or simply to discuss matters related to the topic. You are always welcome to suggest or discuss more efficient methods. Say hi or drop me a reply at twitter. I try to keep my 500px updated time to time so why not become my friend at 500px.
FTC Disclosure: The pages you visit may have external affiliate links that may result in me getting a commission if you decide to buy the mentioned product. It gives a little encouragement to a smaller content creator like myself.








34 responses to “How to setup Efficient Digital Photography Work-flow”